Showing posts with label Butter Powder. Show all posts

Sunday, October 2, 2011

Dani's Homemade Granola


Dani's Homemade Granola:

1 cup Coconut
3/4 cup Sliced Almonds
3/4 cup Chopped Macadamia Nuts
3/4 cup Cashews
1 1/2 teaspoons Cinnamon
1/4 cup Butter (1/4 cup THRIVE Butter Powder + 1/8 cup Water)
3 HEAPING Tablespoons Honey
1 cup THRIVE Freeze Dried Fruit of your choice: (strawberries, raspberries, mangoes,blueberries, pears, apricots, peaches, pineapple, mandarin oranges, etc.)

Preheat your oven to 300 degrees. Mix your Oats, Coconut, Almonds, Macadamia Nuts, Cashews, Brown Sugar, & Cinnamon in a large bowl.


Melt your butter & honey in a small saucepan.


Pour your butter mixture over your dry ingredients & mix until everything is moistened well.


Spread your mixture out on a baking sheet & place on the center rack of your oven. Bake for 7 minutes. Stir your mixture & put back in the oven. Do this for
21 minutes (3 rotations of 7 minutes)


Move your pan to the TOP RACK of your oven. Bake for 3 minutes. Stir mixture & put back in the oven & repeat. You will do this for an additional 25-30 minutes. . .
stirring every 3 minutes!


Once the granola has been baking between 20-25 minutes on the top rack, I start checking the coconut. It sounds silly, but watching the coconut carefully is how I know when my granola is done. If granola isn't done enough it's too chewy & if it's overcooked it becomes burnt.
Your coconut is the key.
You want your coconut to be the perfect shade of golden brown, & you want it to
stand straight up
when you hold it between your fingers. If it leans or falls even slightly, it's not done yet. But if it's strong & stands perfectly straight up in the air, you're ready to go.


My Daddy wanted to demonstrate my coconut trick for ya. (I love my dad!)


Taste the coconut if you have to. It will taste absolutely FABULOUS & will have a perfect little crunch to it.


Once your coconut is done, remove the pan from the oven & cool on your counter. Once the entire mixture is cool to the touch, you can add your freeze dried fruit. This batch I did strawberries, raspberries, & pears. Pineapple, mangos, & strawberries is another favorite mixture in our house.


My dad absolutely LOVES my granola. He told me that's what he wants for Christmas this year. . .
a HUGE BOX full of granola.
He loves his in strawberry yogurt.


This visit was my grandmother's first time trying my granola. She's allergic to fruit so we left the fruit out of hers & added Freeze Dried Yogurt instead. She loved it.


I hope you enjoy this granola as much as everyone in our house does. It does require you to stand in your kitchen for a good 40 minutes, but it's 40 minutes well worth the wait. The granola stays good in an airtight container for about a month. Enjoy!

If you are interested in purchasing any of the ingredients used in this recipe, comment below or visit my website: dani.shelfreliance.com

Monday, September 26, 2011

Buttermilk Caramel Syrup


I was looking for a recipe for buttermilk syrup for pancakes & found this recipe on the allrecipes.com website. It made the yummiest CARAMEL SAUCE ever! It wasn't really a breakfast syrup (way too sweet!), but it would be GREAT on ice cream. Anyhow, it was just yummy so I thought I'd post it on here so you can make it at home too.

Buttermilk Caramel Syrup:

3/4 cup Buttermilk (learn how to make your own butter & buttermilk on my homemade butter post)
1/2 cup Butter (or THRIVE Butter Powder reconstituted)
2 Tablespoons Corn Syrup
2 teaspoons Vanilla

I used homemade buttermilk for my recipe & it was SO SO SO good!


Mix your sugar, buttermilk, corn syrup, butter, & baking soda together in a TALL pan. Boil for 7 minutes & stir constantly. It boils up REALLY high & WILL boil over if you're not careful.


As your syrup is cooling add your vanilla. Stir well & you've got some yummy caramel syrup.


If you'd like to purchase any of the ingredients used in this recipe, comment below or visit my website: dani.shelfreliance.com

Wednesday, August 24, 2011

Cinnamon Sugar Graham Crackers


I have to admit. . . graham crackers bought at the store really aren't that bad for you. They don't contain a ginormous amount of processed foods, but I still thought it would be fun to make some of my own. Can I say FABULOUS? I'll continue making them because they taste almost like a cookie when you make them yourself. I loved it.

I used the recipe straight out of the THRIVE Cookbook. Normally I like to change things up & do it my way, but really this was the perfect recipe & why mess with perfection right?

Cinnamon Sugar Graham Crackers:

1/2 cup Butter, softened (or do 1/2 THRIVE Butter Powder + 1/4 cup Water)
1/2 cup THRIVE Brown Sugar, packed
1/3 cup Honey
1/2 cup THRIVE Powdered Milk, rehydrated (1 1/2 Tablespoons powder + 1/2 cup Water)
2 teaspoons Vanilla
1 Tablespoon Cinnamon
2 Tablespoons THRIVE White Sugar

Sift together the whole wheat flour, white flour, baking powder, & baking soda. Set aside.

In a medium bowl, cream the butter, brown sugar, & honey until light & fluffy.


Stir in the sifted ingredients alternating between the milk & vanilla..


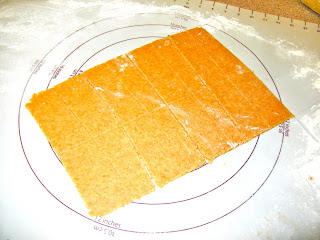
Cover dough & chill in the refrigerator for at least an hour. Preheat oven to 350 degrees. Divide the chilled dough into quarters. On a well floured surface, roll the dough out one quarter at a time into a large rectangle. (just like rolling out sugar cookie dough) The recipe says to roll it 1/8 inch thick, but I though the thicker grahams (1/4 in thick) turned out yummier. So it's up to you. Divide into smaller rectangles with a butter knife.


Place rectangles on ungreased baking sheets. Mark a line down the center of each one without cutting through the dough, & prick the tops with a fork. Combine cinnamon & white sugar & sprinkle over dough before baking.


Bake for 8-10 minutes until the edges are golden brown. Remove from baking sheets to cool on wire racks.


These are SO GOOD. I don't know why I expected them to be not as good as the store bought kind, but they're seriously like eating a cookie. FABULOUS. They're even better with ice cold milk. Mmmmm. The kids LOVED them too. In fact, my little two year old kept sneaking into the kitchen to eat more when I wasn't looking. He almost ate the entire batch the little stinker.


If you'd like to purchase any of the ingredients used in this recipe, comment below or visit my website:

Tuesday, August 23, 2011

Banana Nut Crumble Muffins


These are
THE BEST MUFFINS YOU WILL EVER EAT!
I made these the other day & we ate them ALL at one sitting. They were SO good, I had my sweet husband BEGGING for another batch.

Basically, I just started throwing things together & combining some old recipes I had & this was the end product. I hope you enjoy it as much as we did.

Banana Nut Crumble Muffins:

1/2 teaspoon THRIVE Iodized Salt
3 cups THRIVE Freeze Dried Bananas (or 3 brown bananas)
1 teaspoon Vanilla
1 Tablespoon THRIVE Egg Powder (+ 2 Tablespoons Water in wet ingredients)
1/3 cup THRIVE Butter Powder (+ 1/4 cup Water in wet ingredients)
1/2 cups Chopped Walnuts (optional)

2 Tablespoons THRIVE White Flour
1 Tablespoon THRIVE Butter Powder (mixed with 1/2 Tablespoon Water)

Preheat your oven to 375 degrees. Grease 12 muffin cups (or use liners). Let your Freeze Dried bananas soak in 4 cups of water for 10 minutes until they are soft & ready to be squished. Then drain out the extra water.


While your bananas are soaking, mix your dry ingredients: flour, baking powder, baking soda, & salt.


Add your powdered egg & powdered butter to the dry ingredients. I know it sounds SO strange, but you have to trust me. It works out & bakes just fine. It's hard to get used to, but it makes your food DELICIOUS.


In another bowl beat the bananas, vanilla, sugars, & 1/4 + 2 Tablespoons water (to make up for your powdered egg & powdered butter. . . again, trust me on this.)


Add the wet ingredients to the dry ingredients & mix thoroughly. Add your nuts & stir until evenly distributed. Scoop into the muffin cups until 2/3 full (or even a little more).

In a small bowl mix the brown sugar, flour, & prepared butter powder until you have a nice little crumble. (I had to make two batches of this because I ate most of the first one.)


Sprinkle the cupcakes GENEROUSLY with the crumble. Put a TON on them. It's SO good.


Bake muffins for 18-20 minutes until baked all the way through. We ate them HOT out of the oven & all 12 were gone in minutes.


I hope you enjoy them as much as my family did.


If you are interested in purchasing any of the ingredients listed in this recipe, comment below or visit my website:

Thursday, August 11, 2011

Cheesy Potato Soup


This is another one of those - "Grandma's Best" recipes. My grandma can really cook. Everything I cook I learned from her. She is the best cook I know. Here's a recipe we've been eating for years & years, but I tried making with THRIVE food. It was great!
(& I didn't have to peel potatoes!)

Cheesy Potato Soup: by my Grandma Cherry

1 qt. Half & Half (I never said it was good FOR you)
1 can condensed Cheddar Cheese Soup
1/4 cup THRIVE Butter Powder, prepared (1/4 butter powder + 1/8 cup water)

First, boil those potatoes for a good 20 minutes. Drain.


Mix the Half & Half, Cheese Soup, & Bacon TVP. Pour over the potatoes. Add prepared Butter & cook for another 10 minutes at a low simmer.


Voila! You're DONE. Dinner doesn't get much easier than that right? And it tastes WONDERFUL. Don't forget a few slices of homemade whole wheat bread on the side. This is definitely a family favorite.


If you would like to purchase any of the ingredients used in this recipe (like the potato chunks so you don't have to peel potatoes all afternoon), leave a comment below or visit my website:

Monday, August 1, 2011

Honey Whole Wheat Sandwich Bread


I've always loved baking. I can make just about anything from cakes to cookies. But bread? Not so much. I've NEVER been able to make a loaf of bread. I've tried about 15 times
(I'm not kidding)
to make rolls, bread, cinnamon rolls, you name it, & unfortunately it ALWAYS winds up in the trash. My sweet husband always smiles & TRIES to eat it, but then I tell him to just throw it away. Then he lets out a breath of relief & starts spitting it in the garbage. Poor guy.

People have always told me that with bread you have to find a recipe that suits you & your skills. Even with a good recipe you have to adapt it yourself because only YOU can make your PERFECT LOAF OF BREAD.
I know, discouraging for us not-so-good bread makers.

But. . . . . I've FINALLY FOUND IT! MY perfect loaf of bread. I took several bread recipes & mixed & matched things & adapted it to MY skill & I am ACTUALLY making 4 loaves of bread each week. I haven't purchased bread from the store in WEEKS. My kids LOVE my homemade bread & I must admit, I do too. This loaf is specifically for sandwiches as it slices thin PERFECTLY. It makes great toast in the mornings & wonderful sandwiches in the afternoon. I can usually get about 12 pieces from each loaf & have to bake 4 loaves a week to keep up with my growing family of 7. Most people could probably get away with 2 loaves depending on how often you eat bread. (We eat it A LOT.) Plus it has a sweet taste to it from the honey. Enjoy!

Honey Whole Wheat Sandwich Bread:

3 teaspoons Yeast
1/2 cup warm Water
(Mix & sit for 10 minutes until mixture is doubled & foamy)

12 oz. of Evaporated Milk (9 Tablespoons THRIVE Powdered Milk + 1 1/2 cups Water)
1/4 cup melted Butter (1/4 cup THRIVE Butter Powder + 2 Tablespoons Water)
3/4 cup Honey
Butter


First, mix the yeast, sugar, & warm water & let sit for 10-15 minutes until doubled in size & foamy.


Mix the milk, butter, honey, salt, & wheat flour. Mix in the yeast mixture & let the whole thing rest for 15 minutes in the mixing bowl.


(I love my handy-helpers in the kitchen!)


Add the white flour & mix until a ball forms (because of the stickiness of the honey, I usually add even more flour to the mixture until it forms that good soft ball of dough that you're looking for.) Knead it for 10 minutes. YES, I do this by hand instead of in the mixer because it's therapeutic for me. But you can knead it in your mixer if you prefer that method.


When done kneading you should have a BEAUTIFUL ball of dough that is soft & fluffy.


Place your dough ball in a BUTTERED bowl & turn the ball until it's coated in the butter. Cover with saran wrap or a damp towel & let it rise for at least 1 hour or until it's doubled in size.

Cooking Tip: Let your dough rise in a glass bowl. You can mark the height of the dough by placing a rubber band around the outside of the bowl. With a glass bowl you will be able to see if it has doubled by looking at the height of the rubber band & the height of the dough after an hour.


Punch your dough down (my kids' favorite part) & divide your dough in half. Roll each half like you would roll pizza dough. This is a VERY AIRY bread & you want to really pound out those air bubbles or your bread will have holes throughout it.
(Trust me on this one. . . I know because I was lazy & didn't do this step & my bread was HOLLOW in parts.)


Form into 2 loaves
(wrap your flat dough around into a tube [almost like a burrito] & fold over the sides. Put all seams on the bottom of the pan.)
& put into buttered loaf pans. Spread butter on the tops & let rise another hour in a VERY warm place. [You can do the 2nd rise in your oven at the lowest temperature.]


Put a small glass pan of water in the bottom of your oven. (This adds SO MUCH MOISTURE to your bread.) Bake your bread at 375 degrees for 25-35 minutes. Cover your bread with foil if the crust browns too quickly. Butter your crusts while they're still warm.


Then it's proper to eat a slice STRAIGHT out of the oven. It's always the VERY BEST slice in the whole loaf. ENJOY!


If you'd like to purchase any of the ingredients listed in the recipe above, comment below or visit my website: